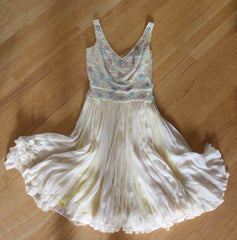
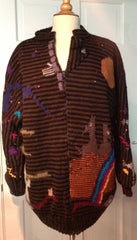
These are the various steps of restoration:
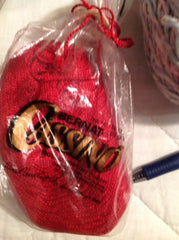
- Cleaning: Manufacturers love to ‘hide’ behind ‘Dry Clean Only’. Most fiber wants to get wet. The best way to clean them is with good old soap and water. The most soiled locations tend to be neck and cuff bands. I start with a stain remover that can be sprayed on like Resolve. Be generous with the solution and let it sit for at least 30 mins. If it’s badly stained Fels Nepal soap, some coaxing with dunking and gentle rubbing will usually move it along. If not, repeat the process. I spent a week cleaning a garment like this. Every day, soak, rub, encourage. Tedious but finally it came clean. I use the washing machine on delicate or handwash cold water with detergent. If the piece is beaded or embroidered TURN IT INSIDE OUT. I can wash up to 3 garments together successfully but never more than one beaded or embroidered piece with two other simple ones. Basically, be aware of the damage that can occur to the beaded piece by another beaded piece. A large washing bag can be used as well but still turn the piece inside out. Knits with any angora or mohair need to be washed separately to avoid shedding onto other garments Put same colors together to wash.
- Blocking: This means after it has left the washing machine it needs to dry. Lay a beach towel outside and out of the sun. Place the sweater right side out on the towel shaping it how it should be. Sometimes, if made of a heavy cotton I will put the garment into the dryer for approximately 15-20 mins. This removes the major wet. Turn right side out and follow as for blocking above.
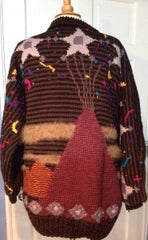
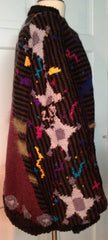
- Repairs: After drying the garment it is scrutinized for holes, piling and other repairs. I use a steel crochet hook to pull any loose ends and french knots from the front to inside. NEVER cut fibers as this weakens the yarn. Knit weave correcting yarns that have crumbled with age. Chenille is notorious for losing its attached filaments fibers. Felts need scissor piling clean as they are magnets that other fibers attach to. Pilings can be removed via hand puling or scissor cutting. A basic razor can be used to shave the pilings off. Follow this with a lint removal brush. Resew or replace any loose beads or sequins. Replace buttons and zippers if needed. Add snaps to assist with closures. Close-in buttonholes that have stretched. Garments with ‘fuzzy’ yarns like angora or mohair need to be re-awakened with a stiff nail brush combing the hairs out. These are antique therefore adding any ‘new’ embellishments can be challenging. Try to mix the old and new together to maintain the vintage look.
- Final: Is a good steam iron press. This allows for the piece to be re-shaped a second time. If there are shoulder pads be sure to steam them back to life.


 This (to me) is like the FDA stamping all of our food with expiration dates. I believe it has been done to force the consumer to buy more (food) or to take any liabilities off the product of origin (clothing). Please don't think I am against food spoilage. That's not what this post is focused on.
 that take all the responsibility off the manufacturer. Or perhaps lay the possibility of destruction onto the poor dry cleaner.
 So many times a "spot" tag is returned with the laundry which simply means we tried to clean it but there was this spot preventing us from doing so. I say to myself: "you charged me how much for that notice and my garment isn't clean?" Who's the dummy here?
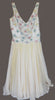
 The bar is great for rubbing into spots and lifting real dirt. Sometimes repeating this action for best results.
  I tend to wash sweaters this way being careful with woolens to stay away from hot or warm water that can shrink it. A pillow case or laundry bag designed for delicate garments is the best way to put the freshly cleaned sweater for a spin in the washer. I don't rinse in the machine but will let the washing machine remove the excess water. As for the dryer. I don't use it usually. My preferred place to dry is laying a sweater flat on a towel in a bathtub or on a towel outdoors. Another alternative to spinning the water out in the machine is to lay the sweater flat on a large towel, turn the sides of the towel in, roll the towel up with the sweater inside and then twist the towel from one end restraining the opposite end. Then repeat this twisting the towel in the opposite direction. Repeat this until all the water is out of the sweater.
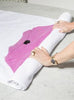
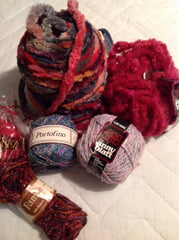
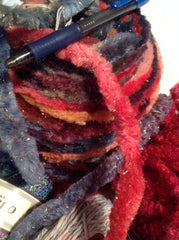

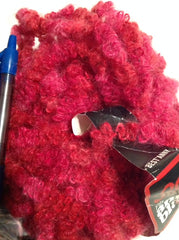
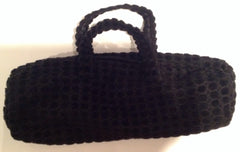
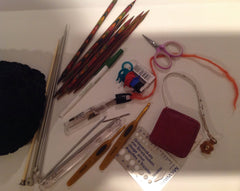 Some other items in my portable knitting needle organizer
 I would look forward to their return which always included something special selected for me and my siblings. Toys I had never seen before or heard of. A whip and top came home once. It was a small wood top with a metal tip that fit in one hand. Accompanying it was a stick that has a piece of leather fastened to one end. By wrapping the leather around the top tightly and then pulling the stick the top would begin to spin with the leather free of it. Continuing to hit the top with the leather would cause the top to continue spinning. The challenge was to keep the top spinning as long as possible. I enjoyed that game for hours.
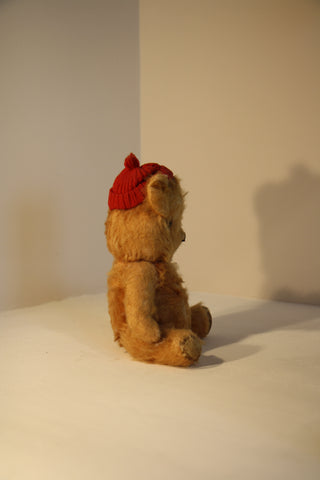 Teddy knew all my secrets, fears and dreams. I really wish he could speak now because I didn’t keep a diary. He could answer many questions I have about my life. He has been the most faithful to me too. Teddy has always been there. He just sits starring off and watching. Today as I look at the bear he is showing his age. His fur is a bit ruffled with some bare spots like someone balding. His beautiful red hat has a hole in it. His scarf is missing. The squeaker doesn’t work and the suede on his pads is nearly worn off. You can make out the squeaker outline in the picture of him. I remember having to really punch Teddy to hear it at all before it quit. I also remember stroking his scarf. It was sewn onto him so I cannot understand why it would be gone.
 The heads on those swayed and bopped a bit. There were papers and school books on the desk too but what caught my eyes the most was a clump of multi-colored yarn with what had to be knitting needles poking out from it.
 On about the third day I stopped and starred at the pile of knitting. After determining that no one was around I ventured into the room to examine the yarn closer. I could see that the #8 needles held about 6” of garter knit material. Obviously this was a beginner project with lots of errors evidenced by a few holes and uneven tension. There couldn't be more than 50 stitches on the needles. Afraid of being caught in the room I quickly left. From that moment on as I passed the room I became annoyed with myself for being such a chicken.
 The next day I crept into the room and knit a whole row. The variegated yarn was fun to knit. The day after that one I knit another row and then I knit two rows on a following day. I managed to knit two or more rows several days in a row. One day as I picked up the needles I noticed that the piece had gotten as long as it was the day I discovered it. The knitting was too neat to be hers too. Panic ensued from within me.

 My First Lesson -

 knobby was. I pondered how the first person to have invented this contraption ever did it. I was so grateful that my Mum was the amazing. She knew so much.